💥🚛 📦 Shop for €350 and enjoy free shipping!!! 📦 🚛

Build or buy a full assembly of custom keyboard

Go to the tab - Fully Assembled Ergonomic Keyboards, select the keyboard that suits you. In the selection options select, case, switches and keycaps. Done.
1. Navigate to the section for pre-soldered keyboards. 2. Select your preferred keyboard and add it to your cart. 3. Follow the detailed steps provided in the product’s description. 4. Choose your desired case, switches, keycaps, and opt for the full assembly service. All these options are interconnected and available for selection.
To build a fully functioning keyboard, you need. 1. Case. 2. Set of electronics and cables, a set of PCBs. 3. Set of switches. 4. Set of keycaps.
The only difference is the controller. So, all parts for wired keyboards like keycaps switch housings are fully compatible with wireless versions. We encourage you to buy the pre-solderd versions of the wireless versions. Then the controller, switch and battery are already installed in the right place.

Shipping and order processing.

Which company will deliver my parcel? All shipments are sent via courier companies such as: Fedex for customers outside the UE Post (Poczta-Polska) GLS for customers in the UE inPost for customers in Poland.
Cost via Fedex without UE: 30-60 euro Cost via GLS with UE: 20-35 euro Cost via Inpost in Poland: 3,5 euro Cost via Post (Poczta-Polska): 8-35 euro Prices depend on the weight of the order
When you have tracking turned off, the shop cannot see where you are from. If you are from outside the EU, you are exempt from VAT in Poland. You will pay it at Fedex in your country before receiving your order. If you are from the EU, the price in your shopping cart will increase by 23% which is the VAT.
Send an email using the email. Then give your order number and write what substitutions you want to make.
Taking care of the highest quality, the waiting time from the order to sending a complete order takes up to 10 business days. Because everything is assembled by hand.
Orders are shipped from Poland, Europe.
Custom-made keyboards are non-returnable under EU regulations.

Cupons / Discounts

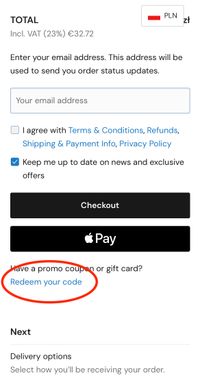
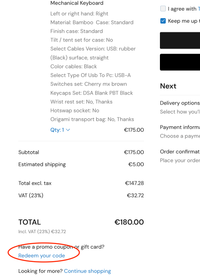
Only one discount coupon can be used per order. Coupons cannot be combined, so you decide which coupon you want to apply.
If your coupon isn’t working, it may have expired or the maximum number of available coupons has been used.

Wired Keyboards Q&A

For split keyboards, ensure the jack connectors are fully inserted into the TRRS jacks on both halves. New jacks can be tight; even a slight misalignment (1mm) can prevent the keyboard from working or cause a short circuit. Avoid plugging or unplugging the jack cable while the keyboard is connected via USB to prevent irreversible damage.
These keyboards are compatible with any operating system and function as plug-and-play devices, just like other standard keyboards.
Contact support if issues persist after following setup instructions.
Instructions for configuring firmware on wired keyboards using QMK Toolbox. Step 1. Download and install QMK Toolbox: https://github.com/qmk/qmk_toolbox (for all wired keyboard using QMK Toobox)
Step 2. By clicking the buttons in the configurators you create your dream layout. You can find the QMK configurator here: https://config.qmk.fm/#/redox/rev1/base/LAYOUT
Step 3. You enter your layout name.
Step 4. You click the "compile" button in the upper right corner.
Step 5. You are installing QMK ToolBox. Please use this link: https://github.com/qmk/qmk_toolbox/releases
Step 6. Here you choose your firmware.
Step 7. Select the "Auto-Flash” option
Step 8. Press the reset button at the bottom of the keyboard 2 times.

Wireless ZMK Keyboards Q&A
To pair the keyboard, ensure Bluetooth is enabled on your device and follow the setup instructions provided.
Battery life depends on features like RGB lighting, under-key illumination, or OLED screens. We use batteries from 350mAh to 1500mAh, labeled on each keyboard. To estimate battery duration, use the https://zmk.dev/power-profiler by selecting the controller (e.g., NiceNano v2) and relevant features.
The master side, connecting to the computer, consumes more power than the slave.
If the keyboard has trouble reconnecting after switching devices, install the reset firmware. Double-click the reset button, then copy the reset file onto the NiceNano v2 / NRFmicro 1.4 drive (included with your purchase). Afterward, reinstall the standard firmware.
Instructions for configuring firmware on wireless keyboards using ZMK.dev The instructions are based on ErgoDash, but select your keyboard from the list. Guide Source: ZMK Docs. In this guide is used the ErgoDash split keyboard as an example. • Nice!Nano Documentation: https://tiny.pl/3mt_q75f • ZMK.dev Documentation • Nice!Nano Discord community: https://tiny.pl/h-ky15zx • ZMK Discord community: https://tiny.pl/z7bgk7yc
Prerequisites: • Windows machine / terminal • GitHub account: https://github.com/ • Locally configured git to access your GitHub account • QMK MSYS: https://msys.qmk.fm/ • Installed and configured the • 2x nice!nano controllers git version control tool
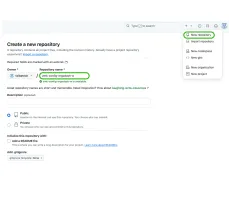
1. Create a new public or private GitHub repo. For example name: zmk-config-ergodash-w. (Do not check any of the options to initialize the repository with a README or other files)
2. Create a github passkey (https://github.com/settings/tokens) token and save it. We will need it later. It will look like "ghp_Q927asd8970asdjh2g3jh12354kjh12Kjhg3"
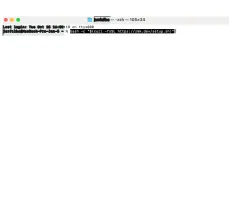
3. After configuring locally your GitHub account and made sure it is accessible – Open QMK MSYS and paste the command line: code: bash -c "$(curl -fsSL https://zmk.dev/setup.sh)"
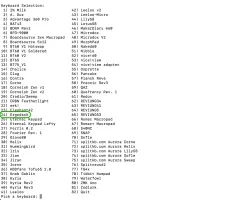
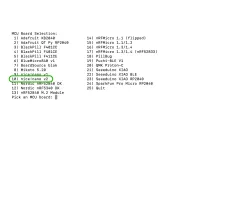
4. Choose your shield (keyboard). In this example it will be a firmware for the Ergodash which corresponds the number 24) Ergodash.
5. Select the controller you want to create the firmware. In this guide it is used Nice!Nano v2. Number 10).
6. Copy in the stock keymap for customization? [Yn]: y 7. Github Username (leave empty to skip github repo creation): ‘press enter’ 8. GitHub Repo Name [zmk-config]: zmk-config-ergodash-w 9. GitHub Repo [https://github.com/falbatech/zmk-config-ergodash-w.git]: ‘press enter’ 10. Preparing a user config for: • MCU Board: nice_nano_v2 • Shield(s): cradio_left cradio_right • Copy Keymap?: ✓ • GitHub Repo To Push (please create this in GH first!): https://github.com/falbatech/zmk-config-ergodash-w.git Continue? [Yn]: y
11. Username for ‘https://github.com’: ‘enter your github username’ 12. Password for ‘https://yourGHUsername@github.com’: ‘do not enter your GH password, but enter your github passkey you created on step 2′ 13. Your firmware should be available from GitHub Actions shortly: https://github.com/ yourGHUsername/zmk-config-ergodash-w/actions 14. Go to your GitHub repo at Actions https://github.com/yourGHUsername/zmk-config-ergodash-w/actions and click the top build from the list: Initial User Config.
16. Connect Nice!Nano to the PC with a reliable cable. Normally, if it’s the first time being connected it will open automatically the folder and appear in your OS as a new USB storage device. If it is not the first time or for some reason doesn’t appear as a storage device, then short with metallic tweezers 2x the pins GND and RST on the controller. It should appear as a new USB storage device now. Copy and paste the respective controller the uf2 file. For the nice!nano on the left keyboard half copy/paste the keyboard_left_nice_nano_v2-zmk.uf2 file, for the right – keyboard_right_nice_nano_v2-zmk.uf2 file. After pasting the folder will automatically close, the storage device disappear and in the Bluetooth & other devices you’ll see the keyboard’s name, if everything was executed successfully

Our Location

You didn't find the answer you were looking for. Write to us - we will be happy to help you make a decision.

Monday thru Friday 8 AM – 3:00 PM